Last time I volunteered as a
DataKind Visualization judge for a CivicData challenge. This time, I volunteered using an
Atlassian Gives Back day off work, to figure out how to tag poles and create a map for my community utilities undergrounding project. The utility project was for Mendocino County, a remote location near the Pacific Ocean. The town I needed to map was not within any cell phone coverage. As a volunteer citizen with only a little bit of free time, I learned that having the right tools makes this kind of project easy and fun!
Prepared to Gather my Geodata
I already had a field geotagging device in my pocket - my smart phone! As long as you have allowed Location services, even without coverage from a cell phone provider, even when both Apple and Google map apps won't work anymore, your smart phone knows your location
within 1-3 meters accuracy! Kind of scary, but proves useful for gathering data.
My first step was to decide what data I wanted to gather and put it in a survey form. The survey form would be deployed to a mobile device so I could record my data out in the field. Here is what I wanted to collect.
- location name (I made up a short naming system before I left my house)
- text description for notes
- location (note: you don't have to worry how the app displays location, the app will convert to decimal and create kml (or kmz or gpx) file)
- pole # if exists
- pole owner (for this town either PG&E or AT&T)
- photos (as many as you want) linked to that location
To the rescue came
Open Data Kit! Open Data Kit was easy to use, a lot like creating forms in Google Drive. The xml file can be imported directly into the ODK mobile app using an external SD drive without having to publish it publicly through appengine. After you collect all your data on your smartphone, you can import the whole kml file directly into Google Earth and/or Google Fusion table, hosted in Google's cloud infrastructure. The benefit to putting your data in Google Fusion is it stays there in case your phone memory gets wiped (especially my iPhone gets wiped frequently) or you change computers and lose track of where you put the data. You can import Google Fusion table directly into Google Earth too. This also helps with reproducible results, you can just hand your data to someone else later and let them visualize it. I loved the ease of conducting a Geodata project using Open Data Kit! The only drawback is mobile deployment only works for Android users.
For iPhone users, I chose
Motion-X GPS. It lets you record all the above data including linked photos. I also liked the feature that lets you give permission to view your location to someone you think will stay within wifi or service coverage, so they can see your blue dot moving around and be reassured even when you're out of calling range. The disadvantage for iPhone users, is they don't let you download the whole database, you have email yourself each point as a .gpx file, then upload each .gpx point directly into Google Earth, manually add the photos, save "My Place" as .kmz file, load the .kmz files into Google Earth (described next) and update your Google Code database from there). Whew, a lot more work for iPhone users than for Android users!
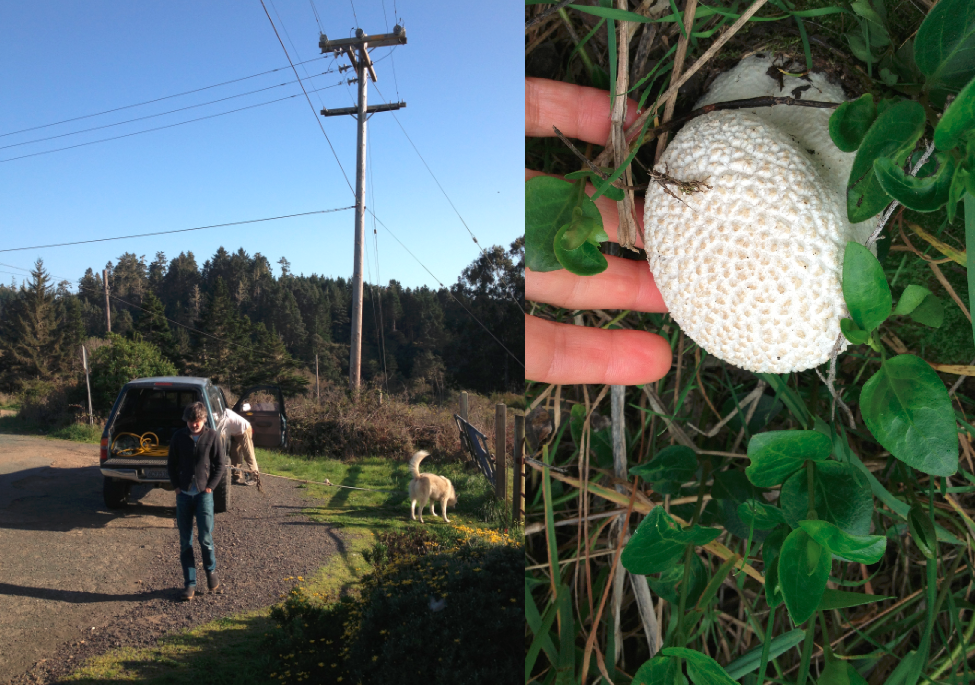
Gathered my Geodata - and found a mushroom!
The night before my field trip, I charged my smartphones, charged external battery (I'm using Anker), and made a few test geotags. I decided to try gathering data on both iPhone and Android to test out how the whole process works with either kind of phone.
GIS Stackexchange was good for random questions I still had, such as how to check a phone's GPS accuracy: if you see 6 decimal places listed, your phone is probably within the prerequisite 5 decimal places for 1-3 meter accuracy. Walk around and check that location readings change as expected. My location display had 6 digits.
Before leaving the house, pre-load the area where you know you'll be into Google Maps and iPhone apps. Map apps will not load in the field without cell phone coverage.
Optional: borrow a neighbor's dog (if you don't have your own) for field trip.
Now get out, enjoy nature and your day off. One place near a pole near a creek, I found a huge edible mushroom that I'd never seen before. I took it later to a local mushroom expert, Alison Gardner, author of Wild Mushroom Cookbook, which is how I found out it was a Western Giant Puffball or Calvatia booniana.
Mapped my Geodata
Because of the breadth of its maps from satellite to street view, I chose to use Google Earth. Here are a few tips I learned:
My Android ODK data was automatically uploaded to Google Fusion as well as I could download entire kml file at once. For iPhone Motion-X data, I had to transfer every single tagged location individually and upload one at a time to Google Earth.
kmz, kml, or gpx format stores location in decimal form, independent of how the app displays the location. I found it reassuring in my mobile apps to view angular notations with separate latitude in DD° MM' SS" N|S and longitude in DD°MM' SS" W|E. Save-as .kmz for internal working since it's more space-efficient. Save-as .kml for final maps to share since that's more standard format.
Because of the 1-3 meter inaccuracy, I needed to adjust the location slightly in Google Earth using visual cues. The most accurate is to use aerial view in Google Earth, looking straight down as perpendicular as you can. Use the photos you took from field with landmarks you can see from Google Earth to more precisely line up your tagged item. Use the "man" and Street View to also help verify.
To suppress text labels: In your left-hand menu, click a Place > right-click Properties > Style > Label set opacity to 0 (zero). Maybe you'll figure out a better way, but the "name" field turns automatically into a "label" and clutters up the look of the map unless you suppress it.
To link your own photos: In your left-hand menu, click a Place > right-click Properties > Add pictures you took of that location. What worked easiest for me: load all my images to Google Drive and use the Google Drive URL to link my photos per location.
I added layers to my Google Earth map. I asked the cartographer at Mendocino County Planning for .pdf property lines for the area. I also asked a few large property owners and the original "company town" owners for more details such as EPA hazard spots and underground water pipes. I followed these overlay instructions to add public record layers.
To add a custom legend, I followed the these legends instructions, required a small amount of kml editing.
Shared my Map
The easiest is to share the .kml file with your public official with instructions how to download and use Google Earth, job done! Here are instructions I gave with my file and I got feedback (County Supervisor and PG&E manager) were able to see all the details.
1. Download Google Earth
http://www.google.com/earth/download/ge/agree.html
2. Download the attached .kml file
3. Open the .kml file using Google Earth - wait for Google Earth to finish its zooming
4. Close the Start-up Tip window
5. Use the +/- slider on right-hand-side to zoom in/out
6. Double-click in the map on a pole you are interested in viewing
7. You will be taken to street view. From here, you can zoom around street view to look at poles near roads up close
8. If there is a picture attached, it will be linked as URL to pop-up info about the pole
9. To go back to Google Earth, click "Exit Street View" in box on top right
Almost done. PG&E and AT&T back office required autocad format, not modern kml. To convert kml to dxf I used
Google App Engine KML Tools. I don't own autocad so I couldn't view it. The County told me I saved them $70K, which is what they paid the last mapping company to create the last autocad maps for them. So with 1 day off work, I saved my County both money and time!
Strangely, Google's efforts to make maps more social means I now can't share this map with general public. A few months ago, I was able to go through 7-step contortion to create a "Classic Map". But now I can only create maps using "new Google maps engine lite". So for now, this is the only part of my volunteer mission that failed. But everything else worked!

